
It's my favorite time of year again...Halloween! Since fairy houses are so dang cute, I thought why not make a pumpkin fairy house? Plus I get to play with a craft tool I am in love with right now - my Mod Podge Mod Melter!
The Mod Melter is different from a traditional glue gun. It heats up really fast and super hot. The melter has it's own special uber long melt sticks in white, clear, silver, gold, and some basic colors. The glue stays "melty" for a time so it makes it the perfect tool to create your own flexible items to accessorize any item with. The Melts won't stick to silicone so I use the Mod Podge silicone craft mat for all of my doodles.
Let's get started. You can do this too!
Supplies you will need:
• Craftable Pumpkin
• Craft knife
• Mod Melter and White Melts
• Silicone Craft Mat
• White Home Decor Chalk Paint
• FolkArt Multi-Surface Acrylic Paints
• Scissors
• Paint Brushes
• Plastic Sheet
• Tracing Paper, Pencil and Marker
• Hot Glue Gun
• Large round wooden disc and small wooden disc
 |
| You can also use a wood burner tool with blade attachment for easily cutting through craft pumpkins. |
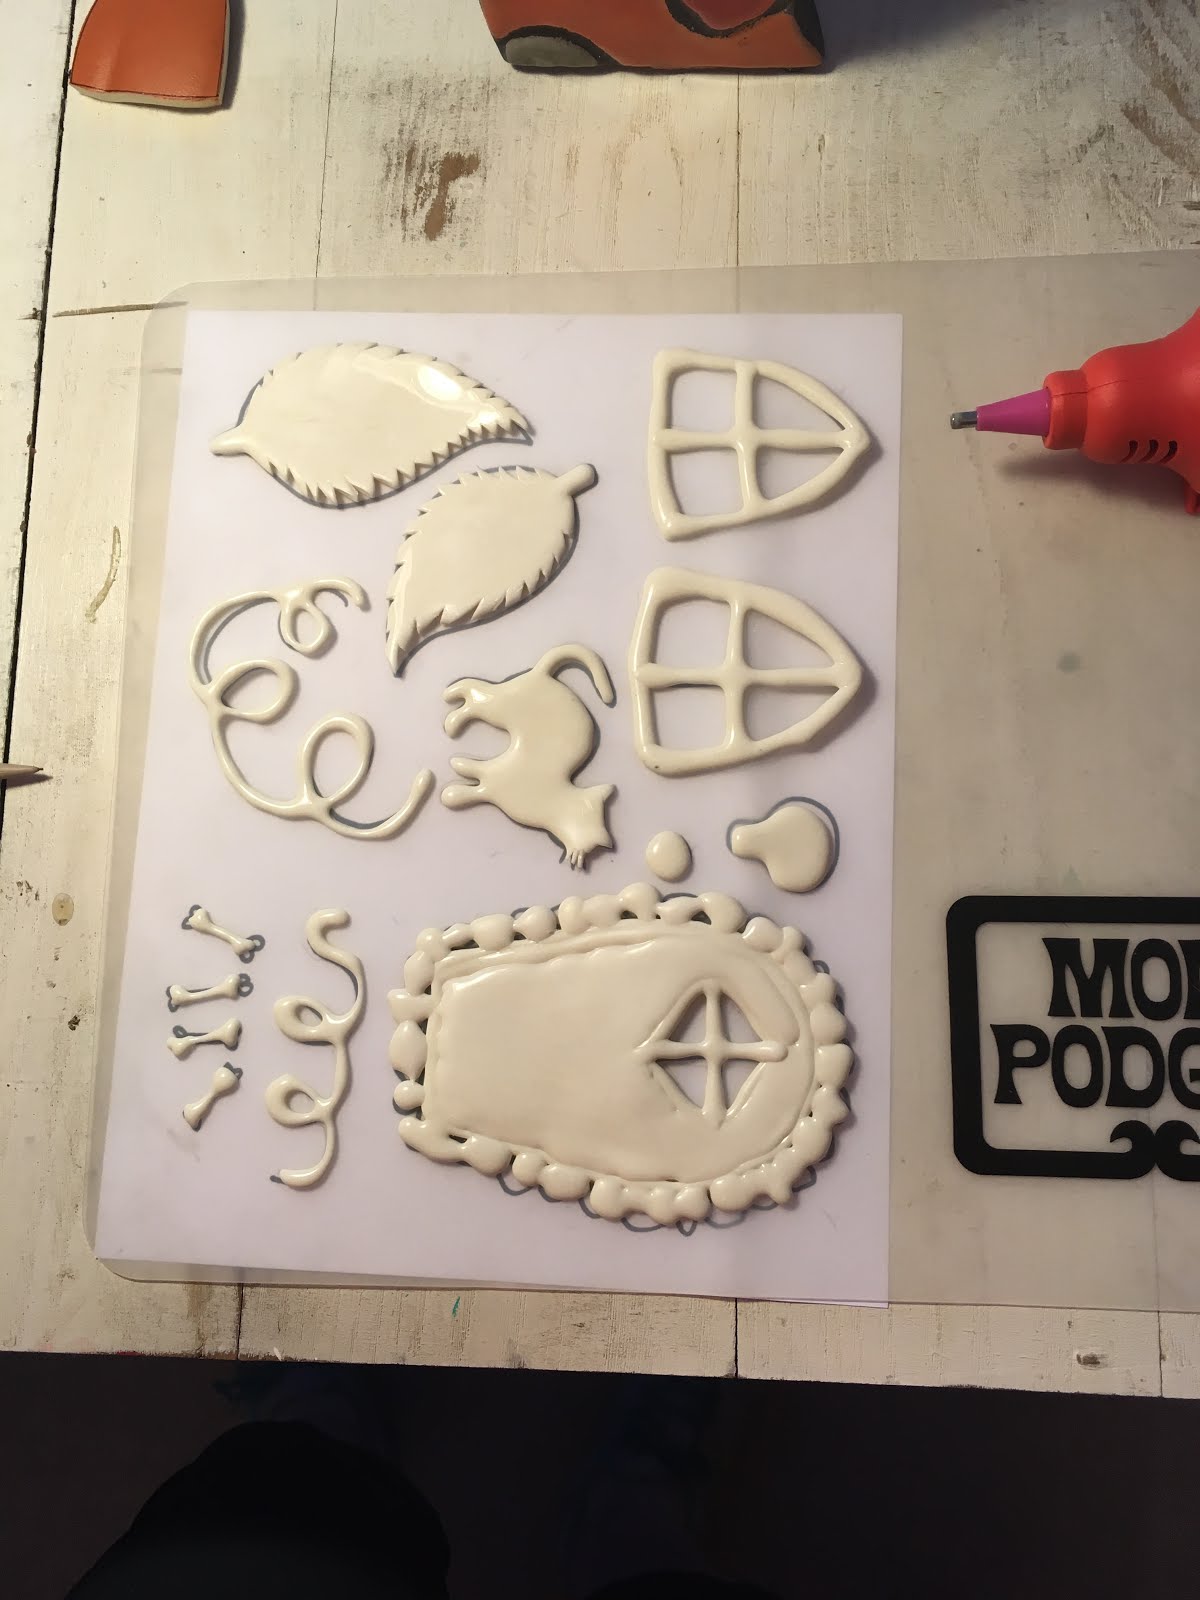
Draw and cut out the windows and a small door window. Also cut a small hole in the back to add a light. Trace the window and door opening on a piece of tracing paper. Transfer to a clean piece of paper. Draw simple line art of items you would like to accessorize your pumpkin with - such as: leaves with vines, a cat, bones, stones around the door, a skull for decoration, mini tombstones, etc. Create your own spooky fairy world!
 |
| Place the paper under the silicone mat and trace the outlines with the Mod Melter. |
You can use a hot glue gun but it won't dry as smooth and as flexible as a Mod Melted piece. I start at the edges and fill in by going around to the center.
 |
| See how smooth everything is? Great painting surface! |
After everything cooled, I painted everything in a coat of white FolkArt Home Decor Chalk paint. This covers the glossy finish of the melts and gives the acrylic a nice primed base. (I cut the leaf edges with scissors to make them jagged.)
 |
| Chalk painted basecoat. |
 |
Dried and ready to paint with acrylics. |
I painted all of the items in FolkArt Multi-Surface paint so if I want to place the pumpkin outside I can. After everything dried completely, I added window panes using a regular hot glue gun. The panes are a sanded piece of plastic with yellow marker colored over it.

Hot glue the pieces on the pumpkin. The melts are flexible so they will form to the pumpkin and look "real"! I glued the tombstones to little wood rounds. I cut up a silk marigold flower to make the mini leaves. I added one of my Christmas house lightbulbs that snaps in the back and has an on/off switch.

The fairies are home and ready for trick or treaters!
You can find the Mod Podge Mod Melter and other supplies here - Mod Melter from Plaid Online
The Mod Podge Melter is also sold at Michael's, Hobby Lobby and JoAnn craft stores.


